Showing posts with label pdf. Show all posts

Friday, 29 June 2012

5 Reasons Why PDF Files Are Best For Final Print

-->
Being a Graphic Design and Print Specialist and running DC-Graphics, I thought I would explain why PDF files are best for final, professional quality print reproduction.

When designing work for clients, I email them low resolution PDF files just so they can receive the files easily and view them. They can then print them out if need be, check and finally approve my design work. Because I supply a low quality PDF at this point, I often have to assure new clients that once the job is approved by them, I will be making a very high quality, high resolution version of their job. This means I will be adding the relevant bleed and crop/trim marks that the print company needs to print the job to the highest standard. It’s a well known fact that PDF files are now the industry standard in the professional world of printing.

The Adobe Acrobat PDF
PDF stands for Portable Document Format created by the Adobe company and you probably already use Adobe Acrobat Reader (if not, go here) to open and view PDFs already. If you haven’t used or worked with PDF’s before, the following information will help you understand why designers and professional printers prefer to receive final approved artwork as a press ready PDF file.

1. With many elements used in a graphic design document, such as fonts, logos, photographic and even scanned images especially, a multi-page document like a newsletter, magazine or book means it will now be quite a considerable file size. Often too large to send by email.

2. Print companies used to require you supply all these elements as separate files on disk, but saving the whole job now as a PDF file means that not only are all these elements embedded, but it will also compress the combined data. So the final PDF when saved, is considerably smaller in memory size enabling it to be easily emailed to your chosen printer.

3. There are no cross platform issues with PDF files as they can be opened and viewed on PC’s as well as Apple Mac computers.

4. Correctly made PDF files can speed up the print process and most professional graphic design software lets you make your PDF from within that package.

5. One last tip – if you are making your own PDF’s – ensure all colours used are in CMYK format and your images, logos and scans are no less then 300dpi (dots per inch) resolution as this will mean less chance of your final printed job ending up with a pixelated, jagged edge look to all images. Don’t worry about the sharpness of the fonts, they will be fine.

Free Advice from Doug at DC-Graphics
There is plenty of other reasons why PDF’s are a printer’s preferred choice of artwork format. The information above is just a brief, basic outline. If you are not sure about anything, then please contact me on: 0208 440 1155 or email me: doug@dc-graphics.co.uk and I will give you some free advice over the phone. Or, if you prefer, like all of my satisfied clients, (see some testimonials here) - let me design your project for you, set up the artwork in the correct way and I’ll arrange the printing for you and get it delivered to any location of your choice.

Thursday, 26 January 2012

How to Organise Design and Print in 6 Easy Steps...

"TIME IS MONEY" is an old business cliché, so when it comes to getting information to your graphic designer in order to get the ball rolling on a graphic design and print project, it pays to streamline the process and get back to what you do best – your job. If you have to keep feeding bits and pieces to your designer or answering questions regarding the project, it can sap your energy as well as your time. Follow my 6 easy steps below and you will find that getting it right from the start will speed things up tremendously, save lots of time and as a bonus, you'll come across as a well organised professional.

 STEP 1. Write a graphic design brief - which is basically a written explanation from client to designer outlining the key aims, objectives and time scales of a creative project.

STEP 2. Supply all text as a Word document to your designer in plain black ordinary text as they will be extracting and formatting it in their chosen font(s) within their professional graphic design package.

STEP 3. Photographic images should be supplied as JPEG files separately, DON'T embed within a Word or PowerPoint document. They need to be as large as possible, ie; copies of the original shots. Avoid downloading existing images from your website as they will be of low resolution (72dpi) and print images need to be 300dpi. Much better to scale images down than to enlarge them. If you use a stock photo library, then always download the 300dpi versions.

STEP 4. Supply logos as vector graphics, normally as .EPS or .AI files. These will reproduce at the very highest quality and sharpness whatever their final size. Make sure if you do, that all fonts are converted to outlines or paths. This means that fonts originally used within the file do not have to be supplied separately.

STEP 5. Your designer will probably supply you back proofs as a PDF file attached to their emails. You will need to check PDF or printed proofs thoroughly, ie; with a 'fine tooth comb' as mistakes missed will need to be corrected and the job re proofed. Thus avoiding a complete re-print which will be costly and delay the final delivery of the printed job.

STEP 6. When you are happy with everything and approved the quote for the quantity required, email your designer/printer and say "approved, please proceed to print."

I hope the above is helpful to all those of you who have to outsource professional graphic design for final printing. If I can help you with a forthcoming project in any way, please have a look at my online portfolio here. Then call me for a brief initial chat on 0208 440 1155.

Monday, 2 January 2012

Supplying Artwork for Print

MANY PEOPLE SPEND HOURS DESIGNING THEIR OWN MARKETING MATERIAL, knowing that they will want it printed professionally – eventually! But not saving your final work in the correct colour format and file type that professionals require can cause serious production problems when professional printing is needed. Having over 25 years' experience behind me means that I can handle everything from concept to completion for you. But, if you just happen to have a design completed and now need it printed, follow my guide below and you won't go wrong when you send your final finished artwork file to print and end up with a job to be proud of.

PDF’s are rapidly becoming the standard file format for transmitting files for printing, but it is important to prepare your PDF file in the correct way. 

 Supplying PDF Artwork 
Press ready PDF - with fonts embedded, for best results – high resolution – 300dpi. Here at DC-Graphics I prefer that all artwork to be supplied to me for printing to be as a high-resolution PDF.
 
Correct Preparation of PDF Files 
When creating a PDF in Adobe Acrobat Distiller, there are job options which must be set for commercial printing. These include default resolution, compression settings and font embedding. Please ensure you choose high resolution. Compression settings for colour and greyscale should be downsampled to 300dpi with “auto compression” set on high. Bitmapped (monochrome: i.e. line art) images should be set at 600dpi. Font embedding should be set to “embed all fonts.”

Bleed 
One of the most important elements in artwork for printing! Please ensure there is 3mm bleed all round the PDF, i.e. save the PDF with 6mm added to each measurement (i.e. for A4 usually 210mm x 297mm, save as 216mm x 303mm). Crop marks may be included if you wish. If your artwork is supplied without bleed I may not always be able to add it on for you and you may have to amend your original artwork yourself and then re-supply a new PDF artwork to me.

Bleed and Crop Marks 
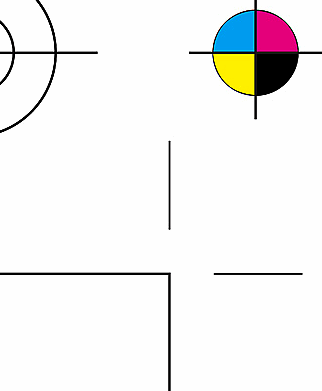
As mentioned above, all artwork must have 3mm bleed if you require the image to bleed off the edge of the paper. Crop marks should be included if artwork does not fill a whole page area (i.e. no bleed). They should be 5mm long, 3mm outside of the page area and coloured in the colour ‘registration’ to ensure they appear on each colour separation. Please ensure that artwork is supplied at the correct finished size (i.e crop size) required. If this is not possible, please inform me to allow time for amending the artwork.
CMYK not RGB 
Please ensure that all embedded images are CMYK (Cyan, Magenta, Yellow, Black) files. RGB images may look good on your screen but final output to print is always in CMYK. One should be aware that files converted from RGB to CMYK may alter the colour composition significantly! Further to this, please ensure that objects that should be black only, (black text, for example) are not RGB black, but only show on the black CMYK channel.

Microsoft Office Files 
When creating a PDF from an MS Publisher or Word file, care must be taken to ensure spot colours are created correctly in your original documents. Do not set to RGB (Red, Green, Blue) colours as they cannot be printed as such.

Supplying EPS Files 
Ensure your files have bleed and crop marks and please confirm the final size of the artwork and supply a hard copy for reference.
 
Artwork Amendments or Re-submission 
I will endeavor to correct any easy to rectify issues that we spot. More extensive amending or correcting is charged dependent upon the amount of time required to rectify. Or I will contact you to advise how to correct the problem and request that you then re-supply a new PDF.
 
Imposition 
Please do not supply imposed pages or pages in “printers pairs” because my printer uses imposition software to impose correctly for our printing processes.

Booklets 
If you are supplying a document with multiple pages, please try and make the front and back cover of the document a separate file, and supply as single pages in page order. Also, please remember to allow for “creep” – I suggest you keep all text and copy at least 5mm away from the trimmed edge.

Fonts 
Include all fonts you have used in the file. Whilst I have an extensive font collection, there is no guarantee the version you have used matches mine. This can create problems with line lengths and spacing of the type. I will assume all fonts supplied are licensed and take no responsibility for embedded fonts.

Lineart and Images 
Scanned colour and greyscale images should be 300dpi at the final size in the document submitted for output. 
Images should be submitted as TIFF’s, EPS or JPEG’s. 
Line Art (bitmapped) should be 600 – 1200dpi at the final size in the document submitted for output.

Screens 
Screen tints may range from 99% down to 1%. From a practical printing viewpoint, anything above 90% or less than 5% will generally not be visible to the naked eye.

Sending Artwork by Email 
Please address it to: studio@dc-graphics.co.uk with any relevant information regarding the job. Maximum file size preferred by email is 10mb. Files larger than this should be sent on disk or by using one of the many file upload sites that are now readily available and allow you to send large files, often free of charge. Check out either www.mailbigfile.com or www.yousendit.com
 
Sending Artwork on Disk 
I can accept CD Rom, DVD, and USB memory sticks. Please include a hard copy of your artwork for reference with any useful instructions. Please quote the order reference number and include a contact name, email address and telephone number in case of a query. Don’t forget to keep a copy of your file, in case I need you to undertake changes or corrections.

High Resolution Digital Proofs 
My print quotes always include a PDF proof. If you require a high resolution digital proof, then these can be supplied for an extra charge. Proofs are calibrated to the printing presses that will print your job.

If all this is too much to bear, then I can obviously design your project for you and all of the above will be taken care of for you at no extra cost at all. Just contact me on 0208 440 1155 or email me here.